Get started
In case you just started with Raspberry Pis, read the articles below first. Please note that I usually use Raspberry Pi 4 for my projects.
 Data Samurai
In case you just started with Raspberry Pis, read the articles below first. Please note that I usually use Raspberry Pi 4 for my projects.
The first step after setting up the Raspberry Pi 4 is to enable RDP connections as it makes life a lot easier working from your desktop as directly on the Raspi.
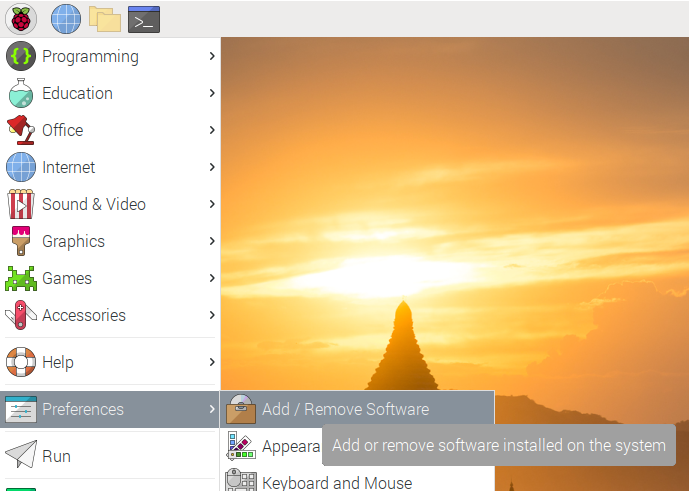
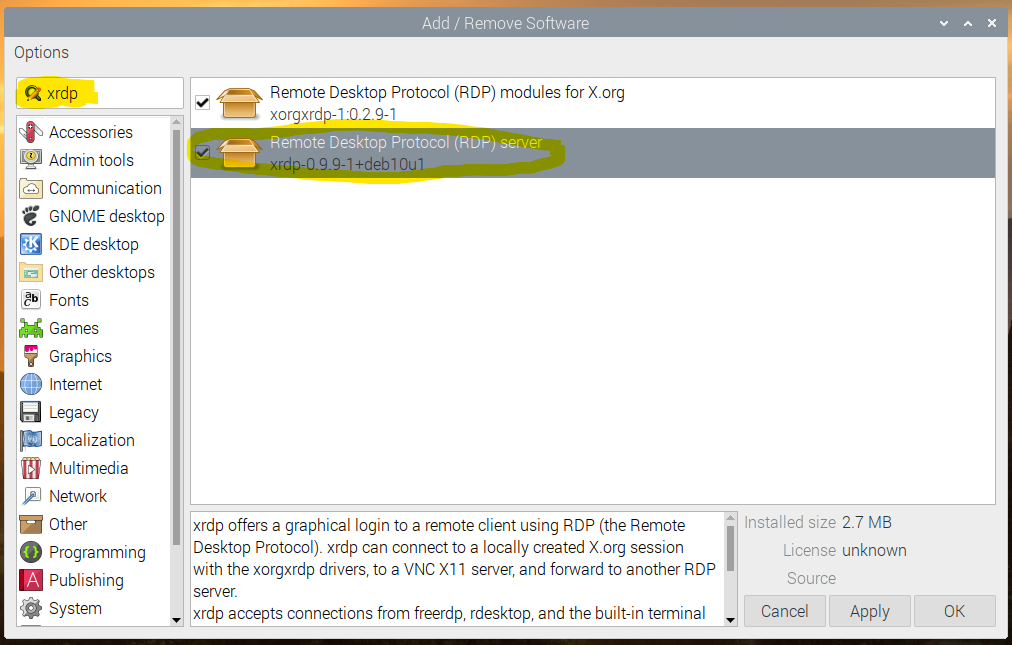
2. Search for xrdp and install the RDP Server and install both packages
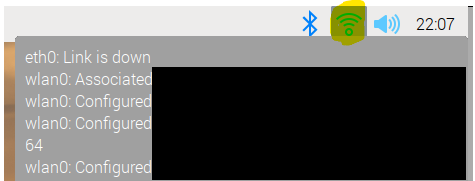
The last step before you switch to your desktop is to note the IP address of your pi. There are two ways to do that
The easy one, keep your pointer on the network symbol in the top right corner until you can see the gray box with the connection details
Alternatively, you can run the command
ifconfig

In Windows search for rdp and start the remote desktop connection.

2. Enter the IP Address
3. Insert your pi login information
For people who want to connect to their Raspberry Pi from another network, there is the option of port forwarding. This is a setting that you have to do on your router at home and enables you to connect from anywhere via RDP. Follow the link below to see the instructions but please be aware that opening a port creates a new vulnerability for your network. As you forward the requests sent to a specific port of your router to your raspberry pi, it won’t be as protected anymore. In some cases, it may be smarter to use another tool or stick to the local network.
Bellow some Basic Raspberry Pi Terminal Commands snippets.
In program for Unix-like computer operating systems sudo stands for Super User Do. Depending on the situation you may need it (due to laziness I just use it all the time).
sudo apt-get update
sudo apt-get upgrade
If you want automatic updates and upgrades.
sudo apt-get install unattended-upgrades
sudo dpkg-reconfigure -plow unattended-upgrades
If you want to know more go here https://www.elektronik-kompendium.de/sites/raspberry-pi/2002101.htm
# Install an app
sudo apt install [package name]
sudo apt install hostapd

# Remove the package from use
sudo apt-get remove [package name]

# To completely remove the package from the system.
sudo apt-get purge [package name]

# To clean up the local repository
sudo apt-get clean [package name]Nano is an easy to use command line text editor. It is especially helpful if you do adjustments in config files which you only can change as superuser.
sudo nano /etc/dhcpcd.confifconfigIf you need the IP only
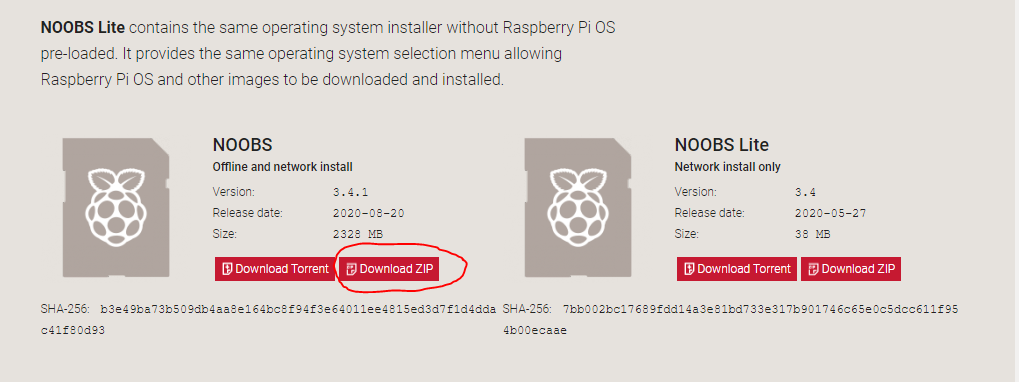
hostname -IWhen setting up a new Raspberry Pi, you need to install an operating system. As I do that very rarely I personally stick to NOOBS (New Out Of Box Software) at the beginning as it is an easy operating system install manager for the Raspberry Pi.
SD cards with NOOBS preinstalled are available in many online shops and are sometimes well pized. If you are not lucky enough to find a good prize or you have an old SD card you don’t need (min 16 GB) follow the steps bellow.
2. Click on NOOBS

3. Then select Offline and network install and Download it as a ZIP
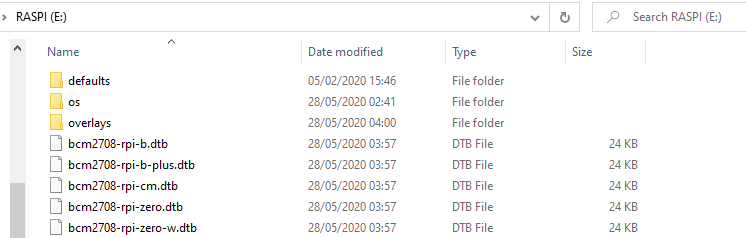
2. Once your SD card has been formatted, extract the files from the zip you downloaded to your SD card (defaults, os, etc.). The necessary files will then be transferred to your SD card and will look like bellow.
4. When the extraction has finished, safely remove the SD card and insert it into your Raspberry Pi.
1.Plugin your keyboard, mouse, and monitor cables first.
2. Then plug the USB power cable into your Raspberry Pi. This will trigger the boot process.
3. During the boot, a window will appear with a list of different operating systems that you can install.
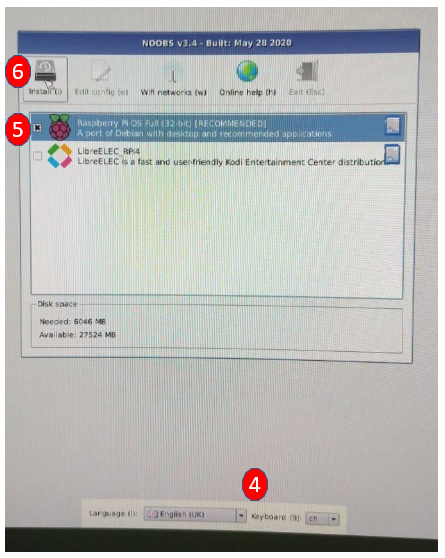
4. Please choose your language and your keyboard layout. I use CH as I have a Swiss QERTZ keyboard.
5. Choose Raspbian by making a tick next to the box Raspbian
6. Click on Install and confirm that all existing data on the drive will be overwritten.
7. Raspbian will then run through its installation process.
8. When the installation process has completed, a welcome window will pop up and guides you through the settings e.g. time zone, password, wifi settings, etc. and ends with an optional update.